

If you like retro video games, you have several options. You can find plenty of older video games ported to newer systems and PC. You can pay for a video game subscription, such as Nintendo Switch Online or the Premium tier of PlayStation Plus. There is also a growing amount of retro game systems, such as the Analogue 3D, that can play real cartridges. But maybe the better option would be to simply build your own emulation-based console with a Raspberry Pi.
It’s inexpensive, powerful, and easier to set up than you might think. All you need is a Raspberry Pi board, a microSD card, a power adapter, and a case to put it all in. And, of course, some form of game controller. Thanks to the developers of open-the EmulationStation front-end, turning this small computer board into every video game system made before 2000 is (relatively) fast and easy
You don’t need to solder anything, or write any code, or even deal with command lines unless you really want to. There are plenty of options to explore and menus to dive into, though, so you should have some computer savvy before you begin. If you aren’t afraid to poke around computer settings, you’ll be fine.
Everything You Need to Build Your Console
Board: To start, you need a Raspberry Pi. If you’re not familiar, it’s a series of inexpensive ARM-based microcomputers designed by the Raspberry Pi Foundation for education and experimentation. It will serve as the core of your retro game system; everything else will feed the Raspberry Pi data, power, or input/output capabilities.
There are several different versions of Raspberry Pi, and for video games, we recommend the most advanced model, the Raspberry Pi 5. It has the fastest processor of all the Raspberry Pi boards, and it includes wireless features like Bluetooth and Wi-Fi. While not intended to be as expensive as a console, a series of price increases has raised the 16GB board to $305 (though you may be able to find it on sale for less). If this is a deal-breaker for you, there are cheaper models with less RAM and older models still available that should still work fine.
(Credit: Michael Justin Allen Sexton)
Power:On its own, the Raspberry Pi doesn’t come with a power supply, so you’ll need to provide your own. The official 45W Raspberry Pi charging cord costs $15. A 27W cord is also available. Don’t skimp here; even if you can power your Raspberry Pi with your phone charger, the inconsistent current can lead to glitches and poor performance.
Storage:The Raspberry Pi doesn’t have any onboard storage to speak of, so you need to get a microSD card. This shouldn’t be too big of an investment, since you don’t need a huge card. The RetroPie software and most older games won’t take up a lot of space. The Foundation’s official 32GB microSD card is around $20. To cut down on costs, you may even be able to make a 16GB card work. Lastly, you should get yourself a standard USB drive. Any size, design, and speed will do. It’s the easiest way to put games on the console.
(Credit: Raspberry Pi Foundation)
Case: Finally, you’ll want to place the Raspberry Pi inside something. It ships as a plain computer board, and it will run just fine as is, but you should really get some sort of plastic shell to protect it from dust, moisture, and getting knocked around. Raspberry Pi cases are cheap and plentiful. The Foundation has its own cases, but you’re free to get creative and find something you really like. Just make sure it’s a case that’s designed to fit your specific board.
Input:Lastly, you’ll need a game controller. RetroPie is robust in terms of controller compatibility, so if you only have a PlayStation or Xbox controller, you can use that. You can also order retro-styled game controllers or even a fight stick. Manufacturers like Retro-Bit, Hori, and 8Bitdo make great gamepads. You should have a keyboard on hand—any model will do. It won’t be necessary outside of the initial setup, but it will help if you want to navigate system menus or change settings.
Don’t want to track down all these disparate pieces of tech? You can find Raspberry Pi kits from third-party retailers that give you the board, power supply, case, and memory card in one bundle.
(Credit: Raspberry Pi Foundation)
Install the Operating System
You’ll also need an operating system to power your gaming console—this is where RetroPie comes in. It’s a Raspberry Pi-friendly Linux distribution with a compatible version of LibRetro’s RetroArch software overlaid on top, set to automatically jump into the emulation software you want to use without dealing with a lot of Linux command lines on your end.
To start, install the free software 7-zip and Etcher. These will let you put the RetroPie software on your microSD card without any typing or complex commands on your part. Go to the RetroPie website and download the latest version of the software (currently version 4.8). Make sure you get the version for the type of Raspberry Pi board you have. It will download as a single .img.gz file, which you can then use 7-Zip to unzip as an .img file.
Now, put the microSD card in your computer. If your machine doesn’t have an SD card slot, or if you no longer have the SD adapter that came with the card, you’ll need a card reader. To turn this card into a functional RetroPie installation, you need to write a full disc image onto the card. Open Etcher and select the microSD card drive and the .img file you unzipped. Click Start,and the software will format the card properly and write the disc image to it.
When it’s done, Windows might prompt you to format the card in order to use it. Don’t! It’s ready for the Raspberry Pi now, so simply take it out of your computer.
Build the Physical Box
This can look like one of the most daunting tasks because you need to work with a bare circuit board, but it’s incredibly direct and easy. Unless you’re using add-on boards to build particularly complicated custom devices, the Raspberry Pi is meant to be an all-in-one affair.
Take the microSD card you wrote the RetroPie disc image to and insert it into the board’s microSD card slot. Raspberry Pi cases typically offer easy access to the slot, but just to be safe, it’s easiest to insert the card before you install it. Next, you’ll want to secure the board inside the case. The exact process will vary based on the exact case you bought, but typically it can either be screwed in or snapped in.
Connect an HDMI cable, game controller, and keyboard into the appropriate ports, then link the cable to a TV or monitor. When everything’s ready, plug the power adapter into the wall to power on the Raspberry Pi. If you use an optional power switchboard or your case has a built-in power switch, you’ll need to flip the switch to turn it on. That’s it! Your box is set up.
When you turn the board on, the screen should display a startup process, showing Linux commands getting executed before the RetroPie logo appears. From here, it may take a few minutes to set everything up the first time.
The system will prompt you to set up your gamepad, which should be plugged into one of the Raspberry Pi’s USB ports (Bluetooth can be set up later). Follow the instructions to map your controller’s inputs to the appropriate commands on the system. This manual calibration helps make sure that buttons do what they should be doing in RetroPie’s Linux environment. Don’t worry if you press the wrong button; you can reconfigure things afterward—just have a keyboard as a backup if you really need to reset things.
When everything is set up, the RetroPie main menu will appear. You can’t do much from here now, but if you want to look through the different settings menus, feel free (but be careful before making any changes). Before we move on to the next step, plug your USB drive into the system and wait a minute. RetroPie detects any USB drives you plug in and adds the appropriate folders for all of the game systems it supports. Pull the drive out for now.
Press the button you configured as Start on your gamepad, select Quit, and shut down the Raspberry Pi. It’s important to run through the shutdown process before you turn off or unplug the system; it’s just like a regular computer that way.
RetroPie can play games from several dozen classic computers and game consoles, thanks to LibRetro’s back-end. You can play NES, SNES, Game Boy, Sega Genesis, PlayStation, Neo Geo, and even Atari Jaguar and Virtual Boy games, if you can find them. We can’t tell you how, because that’s very much a legally gray area. However, if you have a method of pulling game images from your own cartridges, you can put them on the RetroPie easily, putting your entire classic game collection into a tiny box.
You can also play older computer games on the RetroPie, which has many more options for legitimate imaging and importing. Classic DOS games, for example, can be purchased on GOG.com. GOG configures DOS games to run in Windows using the DOSBOX emulator, but the games themselves are completely intact and can be put on the RetroPie. RetroPie even supports systems like the Commodore 64, MSX, and ZX Spectrum. If you’ve held onto your original disks, and have a drive that can read them, you can create disk images to play on your RetroPie console.
Take the drive you plugged into your board and put it into your computer. It should now have a retropie folder on it with subfolders for BIOS, Configs, and ROMs. Here, you’d want to add files to the right folder. In BIOS go the system files required by certain emulated consoles to function. We can’t tell you where to find them, but they aren’t necessary for every platform. Configs will hold individual emulator configurations. This can be useful if you need to tweak settings, but you don’t need to touch them right now.
Recommended by Our Editors
Don’t Buy, DIY: 6 Fun Projects You Can Try With Your Raspberry Pi
Stop Paying for VPNs: I Built My Own in Hours With a Raspberry Pi 5
Stop Paying for Google Drive. I Built My Own Home Storage Cloud Using a Raspberry Pi
ROMs is where the games go. Every supported platform your retro system can currently play will have its own folder. The most common systems should be available, but you might need to hunt down a specific emulator if you want to play something really esoteric. Find the files you want online and put them in their respective folders.
When you’re done loading games onto your USB drive, take it out of your computer and plug it into the retro system. Turn the system back on and wait—seriously, wait. RetroPie will automatically copy everything from the retropie folder on your drive to the microSD card, and depending on how many games you have, it can take a few minutes. Unless your USB drive has a read/write light on it, you won’t get any indication when it’s done, so take a walk.
After a good wait, pull the USB drive out. Press Start, select Quit, and choose Reset EmulationStation. This will refresh RetroPie’s interface and display any games copied to the system.
Start Playing
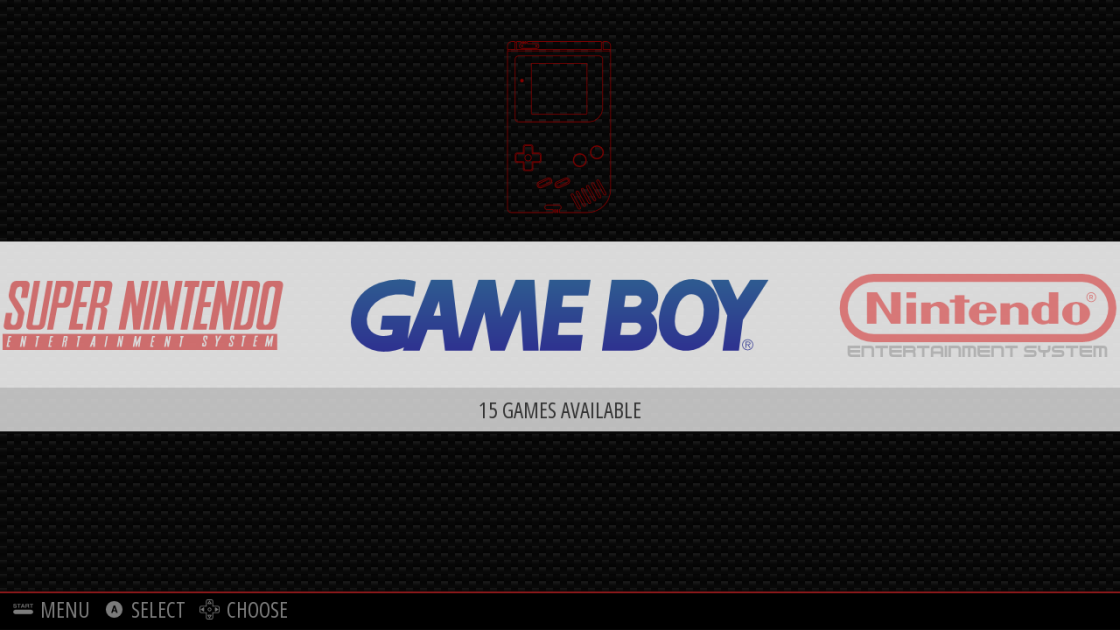
Now you can play your games. RetroPie organizes titles in its library by individual menu screens for each system. Pressing left or right on the gamepad flips between the games of a specific console, such as SNES or PSX. Empty libraries won’t show up, so if you only see the RetroPie screen and can’t go to individual systems, the import process didn’t work.
Select a game and press the button you mapped to A to start it. RetroPie will load the relevant emulator and start running the game. From here, any console or handheld game, or any computer game that supports gamepad controls, should simply work with your controller, since you already mapped the buttons on it.
When you’re done playing a game, hold the Hotkey Toggle button (usually Select, depending on how you set up your controls) and press Start. This is the hotkey combination to quit your game and go to the main menu. You can also hold down the Hotkey button and press the right shoulder button to save your game state, or Hotkey and the left shoulder button to load your game state. The Controller Configuration page has all the default hotkey combinations you can use.
That’s it! You now have a retro game system that can play thousands of games across dozens of consoles and computer platforms. Just note that the process won’t always be seamless. Emulating is not always consistent because some consoles—and even individual games—are more demanding than others. For instance, you might not have issues running PlayStation games, but the Nintendo 64 can be notoriously difficult to get working.
Connect to Wi-Fi
Though it’s not strictly necessary to play games, you can also connect your retro console to Wi-Fi for easier maintenance and customization. For system-level settings, including internet connections, select Raspi-Config in the RetroPie menu, then select Connect to WiFi Network, and choose the network’s SSID. An on-screen keyboard will appear so you can enter the password, though you might want to break out your keyboard for this step. Once signed in, your system should be able to connect to the internet for updates and downloads. You can also use an Ethernet connection by simply plugging an Ethernet cable into the Ethernet port on the board.
Once connected to the internet, you’ll be able to update RetroPie and its individual emulators, as well as add box art and metadataustomize the look of your menus, select ES Themes in the RetroPie menu, then download any of the dozens of available themes. Once they’re installed on the system, you can select them in the UI Settings menu
Set Aspect Ratio
In some cases, you may find that games act weird or look stretched out. These are easy fixes, but you need to dive into RetroPie’s menu system. For basic graphical and emulation issues, the Configuration Editor is your go-to menu. It lets you set basic emulator defaults or tweak each individual emulator. The most common issue with a fresh RetroPie system comes down to aspect ratio. RetroPie defaults to emulating games at 16:9, while most classic games were designed to be played at 4:3. This is an easy fix.
In the RetroPie menu, select Configuration Editor > Configure basic libretro emulator options > configure default options for all libretro emulators > Aspect Ratio. Changing 16:9 to 4:3 should fix any stretched-out classic games you want to play. When you’re done, press right on the direction pad so the highlighted button says Cancel, and cancel your way back up the menu tree until it puts you back in the EmulationStation graphical front-end.
About Our Experts
Will Greenwald
Principal Writer, Consumer Electronics
Experience
I’m PCMag’s home theater and AR/VR expert, and your go-to source of information and recommendations for game consoles and accessories, smart displays, smart glasses, smart speakers, soundbars, TVs, and VR headsets. I’m an ISF-certified TV calibrator and THX-certified home theater technician, I’ve served as a CES Innovation Awards judge, and while Bandai hasn’t officially certified me, I’m also proficient at building Gundam plastic models up to MG-class. I also enjoy genre fiction writing, and my urban fantasy novel, Alex Norton, Paranormal Technical Support, is currently available on Amazon.
Areas of Expertise
Latest By Will Greenwald
- Yes, Your TV Is Spying on You. Here’s How to Stop It
- Amazon Ember 43-Inch 4-Series Review: A Sleeker Look Can’t Save an Outdated Picture
- I Flew to Canada to Test the Banned DJI Osmo Pocket 4P (And It Was Worth It)
- The Best Bluetooth and Wireless Speakers for 2026
- The Best GPS Devices for 2026
- More from Will Greenwald
Read Full Bio
Jason Cohen
Senior Editor, Help & How To
Experience
As PCMag’s editor of how to content, I have to cover a wide variety of topics and also make our stories accessible to everyday users. Considering my history as a technical writer, copywriter, and all-around freelancer covering baseball, comics, and more at various outlets, I am used to making myself into an expert.
I believe tech corporations are bad, but you might as well know how to use technology in everyday life. Want more how to content delivered right to your inbox? Sign up for the tips and tricks newsletter that I curate three times a week.
My job as how-to guru means I use just about every gadget under the sun, so I can figure out how everything works. I work from a Lenovo ThinkPad running Windows 11, but also have a very large Dell Inspiron 17 3000 and Apple silicon MacBook. I have a Google Pixel 6a for personal use and use a Galaxy Z Flip 4 for additional Samsung-related testing. For iOS coverage, an iPhone 13 mini works like a charm, though it’s already becoming a little long in the tooth.
My desktop situation includes a dual monitor setup with a modest Acer monitor. I also use a Logitech vertical mouse (who can use these ThinkPad trackpads) and a Havit keyboard (my first mechanical keyboard; I love it but my wife hates it!). I’m a recent convert from wired headphones; I have Anker Soundcore Liberty Air wireless earbuds for personal use and have taken to the Sennheiser HD 450BT headphones for work.
Whenever I have a second to myself, I’m probably gaming on my Nintendo Switch 2, Steam Deck, or Xbox Series S. I also still have a bunch of classic consoles lying around as well.
Areas of Expertise
Latest By Jason Cohen
- Equifax Might Owe You $600 From Its $2.2M Settlement. Here’s How to File a Claim Before Sept. 1
- How to Watch the 2026 Leagues Cup Live Without Cable (Even for Free)
- Time to Resubscribe? Get Big Walk, Dying Light 2, and Signalis With PlayStation Plus This Month
- How to Watch the 2026/27 Premier League Live (Even for Free)
- Missing the Windows 10 Taskbar? Try These Windows 11 Tweaks to Move, Resize, and Customize It
- More from Jason Cohen
