

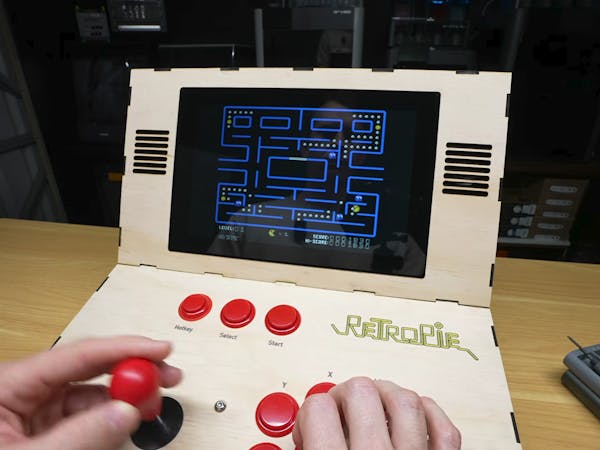
One of the more popular uses for a Raspberry Pi is as a retro arcade machine. Most of these projects either leave the board exposed or stuff it into a repurposed enclosure. But if you’re going to build an arcade machine from scratch, Michael Klements thinks it should have a design you can be proud of. That’s why he put extra effort into his DIY tabletop arcade machine built around a Raspberry Pi 4. It’s not just functional, but also beautiful.
For a project like this, your first instinct might be to use the latest hardware. But given the cost of a Raspberry Pi 5 these days, Klements instead chose a 2 GB Raspberry Pi 4. For older consoles and arcade games, the Pi 4 provides more than enough computing horsepower. However, if you want to play games from the later 1990s and beyond, you might need to pony up for a Pi 5.
The hardware (📷: Michael Klements)
To keep the wiring neat inside the case, the project uses a 10-inch SunFounder touchscreen that includes a built-in 5V, 5A power output. A short USB-C cable powers the Raspberry Pi directly from the display’s internal power board, eliminating much of the wiring that typically clutters small arcade cabinets.
More demanding games can heat the Pi up, so it is important to consider cooling when the hardware is enclosed in a case. A stick-on aluminum heatsink is attached to the Pi’s processor, and a PWM-controlled fan mounted above it can be adjusted — or disabled entirely — depending on operating temperatures.
Installing the hardware in the case (📷: Michael Klements)
The controls come from an inexpensive USB arcade kitemselves as a standard USB game controller, RetroPie recognizes them without additional drivers. The layout includes a traditional arcade joystick, six primary action buttons, and dedicated Start, Select, and Hotkey buttons for navigating RetroPie’s interface
The enclosure was designed in Inkscape using 3 mm plywood as the target material. Finger-jointed edges make the cabinet largely self-aligning during assembly, and removable rear and bottom panels secured with M3 screws provide easy access for future maintenance or upgrades.
Fabrication was handled with an xTool M2 laser cutter and UV printer. Rather than applying decals after assembly, the machine prints colorful retro artwork directly onto the plywood before cutting the individual pieces. Side graphics, button labels, and Pac-Man-inspired artwork are all included on the finished cabinet, giving it a polished appearance that would be difficult to achieve by hand.
Many consoles are playable (📷: Michael Klements)
The cabinet is glued together using wood glue and masking tape as temporary clamps, the speakers are mounted with heavy-duty double-sided tape, and the joystick and buttons are installed into the laser-cut control panel. A custom adapter ring was designed for the smaller Hotkey button so it fits securely alongside the standard arcade controls.
A few small details, including rear-mounted power and Ethernet pass-through connections, rubber feet to keep it planted on a desk, and flush mounting for the display behind the front bezel, give the machine a finished look. For more details on the build, give the video below a watch.
game console
single board computer
arcade
Nick BildR&D, creativity, and building the next big thing you never knew you wanted are my specialties.
